|
 |
Commodore PET Projects
- petSD+ |
petSD+ Tooling

"Specialist" Tools
In addition to the basic tools required to assemble the PCB,
building a petSD+ requires the use of additional
hardware and software to program the microcontroller. There are
a few different scenarios that dictate what, if any, tools are
needed :-
|
Scenario |
Details |
|
|
| Buy a petSD+ kit |
The kit will include a
pre-programmed MCU. After initial programming,
firmware updates can be done by the boot-loader from
a new firmware image on the SD card. MCU
configuration items, such as setting the clock
source and enabling serial programming, are modified
by setting "fuses". This requires the use of a
device programmer/downloader. |
None (AVR Fuses
cannot be changed) |
None |
| Build your own |
If the ability to reprogram the
firmware or change the MCU fuse map is not required
. . . .
Download the MCU boot-loader from
the website. Set the device fuses and load the
boot-loader to the device using a cheap
programmer/downloader. |
(see
below) |
AVRDUDE
AVR Downloader / UploaDEr |
| The Full Monty ! |
If you want to be able to edit the
firmware source code and recompile it, you can download and
install Atmel Studio from the Atmel website. It is
free to use. It is a good idea to get a cheap
development board that you can "play" with, not
necessarily for petSD+. but for learning about the
MCU. |
A cheap, no frills,
development board and
programmer. |
Atmel Studio |
|
Programmers etc. |
|
USBASP
programmer |
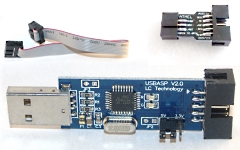
There are lots of cheap (£2 - £3)
USBASP programmers, such as this one,
available on ebay. (Try searching for
USBASP) Note : The ISP connector on petSD+ is
the 6-pin version, if the programmer does not have
one included, you will need a 10-pin to 8-pin
adapter. |
 |
|
AVR
Development Board |
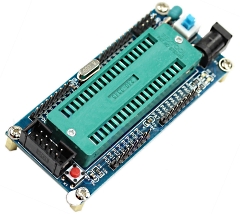
Again, there are lots of cheap AVR
Development boards on ebay, including minimal boards
like this at a couple of pounds and slightly more
expensive ones at around £5 which include LEDs &
switches etc. (Try searching for
AVR Development board) The ZIF socket on this
board makes it ideal for programming multiple
devices. |
 |
See the Firmware
page for a description of the steps required to program
the petSD+ firmware, these are the tools that I use to
perform the functions described there.
|