|
 |
LAN
Overview |
Cabling
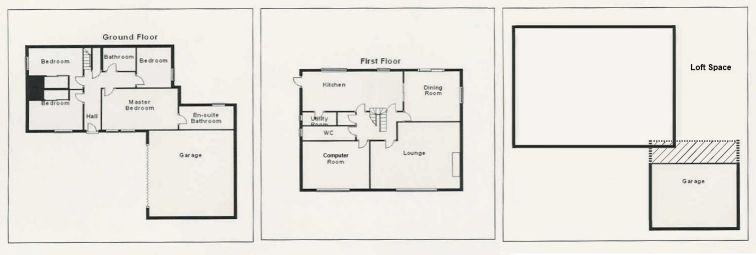
Introduction The basic layout of the
house is shown in this plan from the seller's pack when we bought it . .
.

When we bought the house in 2004, it had been rented out for a number of
years to a multinational
company for use by some of their expat staff.
Although it was in pretty good condition, it was a bit "tired" and we wanted to do a fair bit of
modernisation - installing a new kitchen and bathrooms, and some quite
disruptive refurbishment, such as replastering most of the ceilings. We
had the luxury of not having to move in quickly and the refurbishments
gave me time to install extensive cabling that I thought would give me a
good infrastructure for my various hobbies.
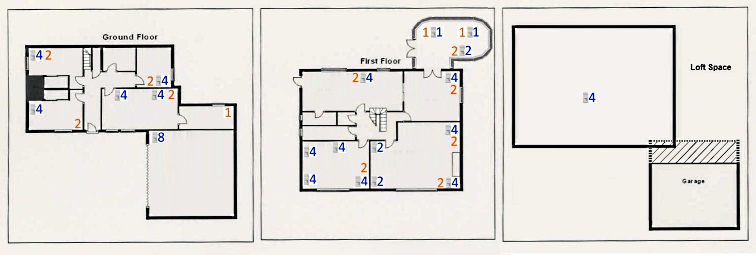
Without having a detailed "smart home" design in mind, I wanted to
install enough cable to give me flexibility to adapt as my needs became
clearer. I decided to invest in good quality cabling and installed
Category 6 UTP and high quality coax cables in most rooms, terminated
into wall plates. The house had a number of telephone access points,
wired with cheap telephone cable (Cat 3), these were removed, all
telephone connections would be made via the Cat 6 cabling.
 Other than the not so pretty wall plates, I wanted to
hide all of the hardware in either the attic or garage. At the west
side of the house, there is a 6" duct that passes through all floors,
from below the bottom floor, through the attic and out of the roof. It
was designed to enclose a 4" waste/vent pipe, but also had ample space to
take all of my UTP and coax cables into the attic space.

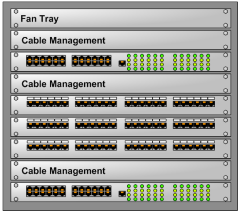
I installed a 9U equipment cabinet in
the attic, populated as shown.
The UTP cables are
terminated in 3 x 24 port patch panels.
Where network
connections are required, short patch cables are used to connect
to a port on one of two managed 24 port Gigabit switches.
In a later upgrade, I added a Dell PowerConnect PoE switch,
it is too deep to fit inside the cabinet, so it is installed
below it and longer (2m) cables are used to connect to the patch
panel. |
 |
| |
|
 |