|
Cisco 7940 Series IP Phone
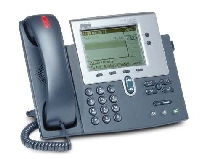
This was the first IP Hardware Phone that I managed to get
working with FreeSwitch, which has more to do with
my lack of experience on IP telephony than any innate weakness
in FreeSwitch. There were a number of steps
required to get my Cisco 7940 configured to work with FreeSwitch
and these are described here. This page gives an overview of the
essential steps, for a detailed description of these activities,
please refer to the Cisco Web Site.
Firmware
The Cisco IP Phone 7960 and 7940 platform has the ability to
support three protocol application firmware versions. By
default, Cisco IP phones are shipped loaded with Cisco's
proprietary Skinny Call Control Protocol (SCCP) firmware,
commonly called just skinny. This firmware is designed to
work with Cisco's Call Manager product. More details on SCCP can
be found in the Wikipedia page
here.
Before you try to use the phone with FreeSwitch, unless the
Cisco Session Initiation Protocol firmware has already
been loaded, you will need to replace the SCCP image with SIP.
More details of the SIP protocol, can be found
here or see the Wikipedia page
here. Replacement SIP firmware is available without
too much difficulty on the internet :-)
The third firmware option is Media Gateway Control Protocol (MGCP)
which is used with third-party call agents (CAs) and is not
relevant to this discussion.
Background
File Transfer Requirements
When loaded with SCCP firmware, 79xx series
phones have a Web Browser Interface available where you can
inspect the configuration of the phone by entering the IP
address of the phone into a web browser. However, this
functionality is lost when the SIP firmware is loaded and all
configuration management needs to be done by file transfer. This
requires that a Trivial File Transfer Protocol (TFTP)
server is available on the network on the same subnet as the
phone. A description of the TFTP can be found on the Wikipedia
page
here. TFTP is commonly used to transfer very small
quantities of data when devices such as IP phones are booted
from the network.
Although I have a Windows Server Domain running here, I do
not have a Windows DHCP Server configured - I use the DHCP
server in my ADSL Gateway/Router to provide IP addresses to the
clients. I believe that the Windows Server DHCP allows you to
provide the address of the TFTP server to the DHCP clients (DHCP
Option 150).
Since my router can't do that, and if you specify DCHP on the
phone it expects to be told where the TFTP server is, I have
configured my IP phones with fixed IP addresses and entered the
IP address for the TFTP server manually.
Not having an existing TFTP server, the first step was to get
one up and running. I looked around for one that was free and
came across the
Free TFTP Server
from SolarWinds.
It's one of a number of network utilities made available free by
SolarWinds and can be downloaded once you register on their
website.
To begin with, I configured the TFTP server on a spare
machine on the network but as the quantity and frequency that
the file transfers are required is small, I've since installed
the TFTP server on the same machine as FreeSwitch
which has not had any impact on the performance of
FreeSwitch.
There were a couple of things that caught me out before I
could get the TFTP server to serve files onto the network that
you should be aware of - these issues are probably common to
whatever TFTP server you choose to use.
1. Windows Firewall
TFTP uses UDP Port 69 as its transport protocol. I found that
this port was blocked by the default Windows firewall
configuration, at least it is in WindowsXP Service Pack 3. You'll need
to open this port in the firewall of the TFTP server.
2. Security
You'll need to set appropriate security on the TFTP server's
root directory and place all required files in this directory.
The default directory used by the SolarWinds TFTP Server is
C:\TFTPServer.
Infrastructure
Configure Network Settings
Before the phone can be provisoned by the TFTP server, the
following network settings need to be configured to allow
communication with the TFTP server
DHCP Enabled - No
IP Address - e.g., 192.168.1.100
Subnet Mask - e.g., 255.255.255.0
Default Router - e.g., 192.168.1.1
Default Gateway - e.g., 192.168.1.1
Reset to Factory Defaults (If Required)
Note : before you can modify the network configuration, you
need to be able to unlock the configuration which is
password protected. If you've picked up a second user phone, you
may not know the password and may need to set the phone back to
defaults.
To reset the phone to the "factory" default configuration,
either power cycle the phone or hold the "*", "6" and "Settings"
keys simultaneously - which will cause the phone to reset.
While the phone is booting, hold down the "#" key, the
phone's display will display "Reset key sequence detected" and
the Headset, Mute and Speaker leds will blink in cycle. While
the Headset, Mute, and Speaker buttons begin to flash in
sequence, release "#" button. The Headset, Mute, and Speaker
buttons flash in sequence in order to indicate that the phone
waits for you to enter the key sequence for the reset. Press
"123456789*0#" within 60 seconds after the Headset, Mute, and
Speaker buttons begin to flash.
If you enter this key sequence correctly, the phone displays
this prompt: "Keep network cfg? 1 = yes 2 = no". In order to
reset the network configuration settings when the phone resets,
press "2".
This will reset all settings, including the password to the
default state, the default password is "cisco". You can then
unlock the network configuration and enter the required network
parameters listed above.
Phone Configuration
Required Boot Files
A good description of the boot process for the Cisco 7960 and
7940 platform is available from the Cisco web site
here. I have included extracts from that reference
here as it is necessary to understand which files are required
to successfully provision the phone for SIP, the SCCP and MGCP
firmware options are not discussed here.
The current boot mechanism for Cisco IP Phones uses the
Universal
Application Loader (UAL).
The UAL eliminates the need for a separate
OS79XX.TXT file which used to be required for booting between
protocols. The universal application loader operates in a manner
very similar to the older SCCP, SIP, and MGCP systems. It relies
on a TFTP server to supply information in text files known as
"configuration files." The information in these files points to
a new loads file, which contains the names of the desired
application image and universal application loader. This system
allows the universal application loader to know which image
revision is desired in the phone. Once this information is
known, the phone has the ability to upgrade itself and the
application image as needed.
Although we're only concerned with SIP here, the UAL
allows the system administrator to use SCCP, SIP, and MGCP, on
the same network. To do this, a hunt algorithm is employed that
searches for multiple configuration files. Depending on which
configuration file is found first, the phone will automatically
select that protocol. The hunt algorithm ensures that the
administrator can assign a specific protocol to a specific
phone. The hunt algorithm searches for files in the following
order:
(where <-MAC-> is the MAC Address of the phone
in question, format AABBCCDDEEFF)
| # |
Function & Notes |
Filename |
| 1 |
Secure and Non-secure Configuration -
See
Cisco Web site
The CTLSEP MAC file is a certificate trust list,
which if populated, contains information about the
servers to which the phone is attempting to connect and
whether the server connection will be secure or
non-secure.
This file is not required for a successful boot but
will generate an error in the TFTP Log if the phone
requests a copy of the file and it is not present on the
server. You can create an empty file to prevent errors
being logged by the TFTP Server. |
CTLSEP<-MAC->.tlv |
| 2 |
The hunt algorithm looks for one of the
next three files in turn SIP MAC File
MGCP MAC File
If one of the above three files is not found, the
phone looks for a Default configuration file which
should contain a pointer to the required loads file |
SIP<-MAC->.cnf
MGC<-MAC->.cnf
XMLDefault.cnf.xml |
| 2a |
The SEP MAC file contains the
load_information tag that tells the phone which image it
should be running. If the image load differs from the
one that is currently loaded on the phone, the phone
contacts the TFTP server to upgrade to the new image.
The information in this file points to a new loads
file, which contains the names of the desired
application image and universal application loader. This
system allows the universal application loader to know
which image revision is desired in the phone. Once this
information is known, the phone has the ability to
upgrade itself and the application image as needed. |
SEP<-MAC->.cnf.xml |
| 2b |
The SIP MAC file defines the custom
configuration to be loaded for the specific phone, e.g.,
proxy server address, phone number, phone label, phone
configuration password etc. |
SIP<-MAC->.cnf |
| 2c |
MGCP MAC File (Not
relevant for SIP and won't be discussed here) |
MGC<-MAC->.cnf |
| 2d |
If one of the previous three files is
not found, the phone looks for the Default configuration
file which should contain a pointer to the required
loads file. |
XMLDefault.cnf.xml |
| |
Once the SIP image has been successfully loaded,
there are two configuration files that can be downloaded
from the TFTP server to provision or
configure the SIP Phone.
|
|
| 3 |
The SIP MAC file defines the custom
configuration to be loaded for the specific phone, e.g.,
proxy server address, phone number, phone label, phone
configuration password etc. The name of each
phone-specific configuration file is unique and is based
on the MAC address of the phone. The format of the
filename must be SIPXXXXYYYYZZZZ.cnf, where XXXXYYYYZZZZ is the MAC address of
the phone.
The MAC address must be in uppercase; the .cnf
extension must be in lowercase (for example,
SIP00503EFFD842.cnf). |
SIP<-MAC->.cnf |
| 4 |
A default configuration file, named SIPDefault.cnf,
which is downloaded by all phones.
The SIP Default file defines the SIP
configuration which is common to all phones, e.g., the
preferred voice codec, dialplan template, time server
address, services and directory urls, etc.
Note: if you're using a variety of different
Cisco SIP phones, make sure that a load image is not
specified in this file - use the SEP MAC file described
above. |
SIPDefault.cnf |
| 5 |
The Ringlist file defines the custom
ring tones available to the phone. The selected ring
tone is downloaded when the phone is being loaded, other
ring tones are loaded when the selected ring tone is
changed on the phone. |
Ringlist.dat |
| 6 |
The dialplan file defines the timeout
before the target phone number is dialled without
waiting for the Dial key to be pressed |
dialplan.xml |
| |
|
|
| |
|
|
| |
|
|
|