A request was made on MEMORUM for:
The author has done some research and identified Code::Blocks as an IDE which provides a possible development environment, and has begun to develop a library of routines. This document outlines the installation and use of Code::Blocks. The description is aimed at Microsoft Windows users, but all the relevent programs are also available for Linux.
This is a work in progress and is subject to any feedback on the forum
The following items are required:
Install Python, SDCC and Code::Blocks in that order.
The following folder structure is recommended for MTX program development:
Create the MTX_Projects top level folder in a suitable location, then install the following items in this folder:
The first time Code::Blocks is started, it should scan your system and identify which compilers you have. On the compiler selection screen (no screenshot available), select SDCC and then click the button to make that the default compiler. Close the dialog.
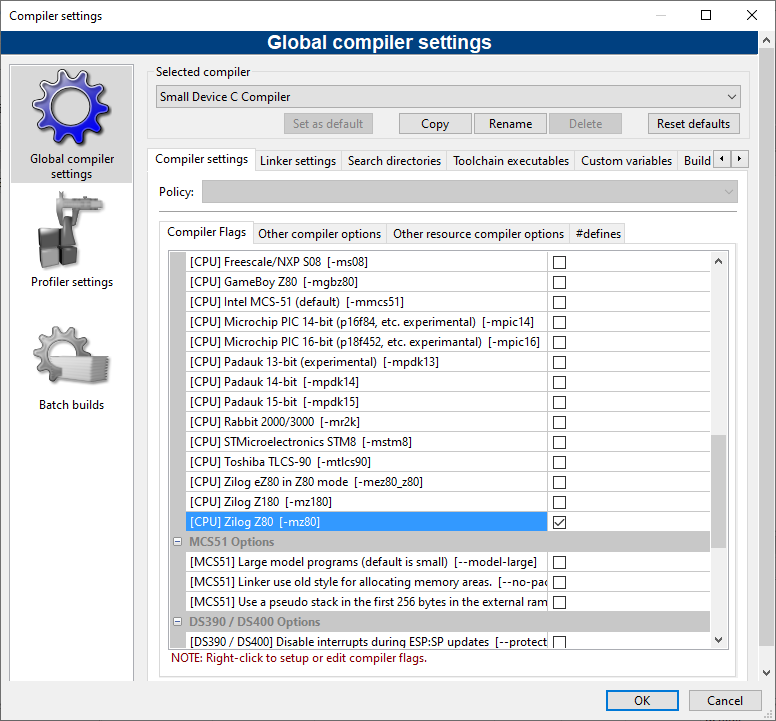
Once the main Code::Blocks window has opened, select "Settinss / Compiler..." from the menu. Ensure that "Small Device C Compiler" is selected. Then under the "Compiler settings" tab, and the "Compiler Flags" sub tag, scroll down, and check the option "[CPU] Zilog Z80 (-mz80)".
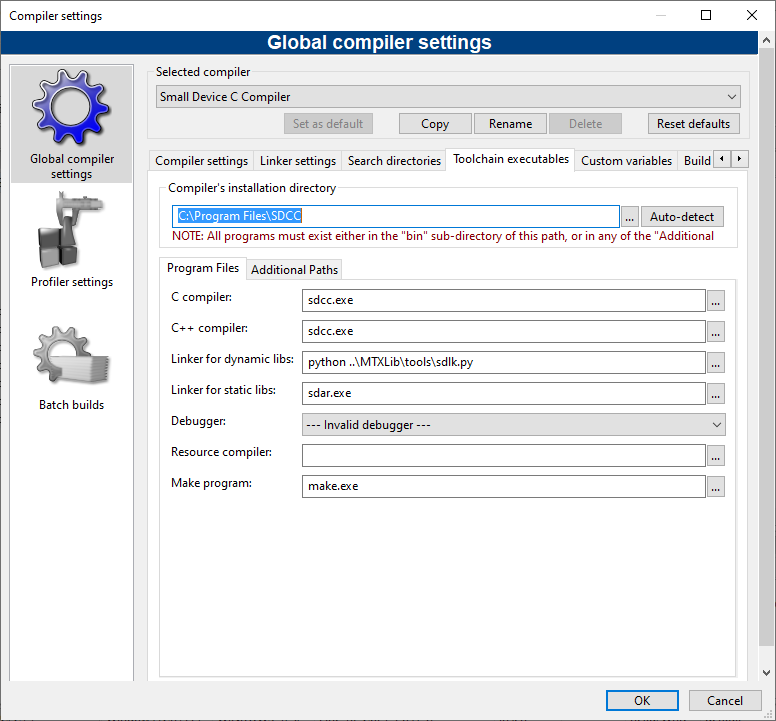
Next select the "Toolchain executables" tab. Change the "Linker for static libs" from "sdcclib.exe" to "sdar.exe" (sdar replaces sdcclib but Code::Blocks has not yet caught up). Also change the "Linker for dynamic libs" (also used for executables) to "python ..\MTXLib\tools sdlk.py" (the default of sdcc sets some link options that are not wanted for the MTX). Then click OK to close the dialog.
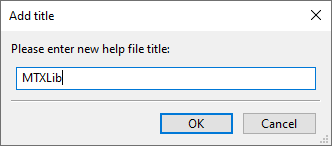
The Windows version of Code::Blocks is able to provide context sensitive help. To configure this select "Settings / Environment..." from the menu. On the left hand pane of the resulting dialog, scroll down to the bottom and select "Help files". Then on the right hand side, click the "Add" button. Set the help title to "MTXLib" then click "OK".
At the next dialog, select "Yes" to browse for the file location:
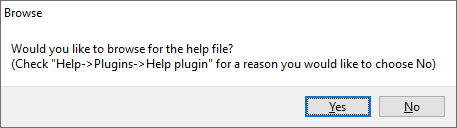
Browse to select "MTX_Projects\MTXLib\docs\routines\MTXLib.html". You will have to select "All files (*.*)" in the file open dialog to find this file. Click "Open" to select the file. The full path of this file will now be shown in the edit box just below the main box. Edit this path, replacing "MTXLib" by "$(keyword)". The full path should then look something like:
MTX_Projects\MTXLib\docs\routines\$(keyword).html
Check the "This is the default help file" option. Optionally (your preference) check the "Open this file with the embedded help viewer". Set the "Default keyword value to "MTXLib".
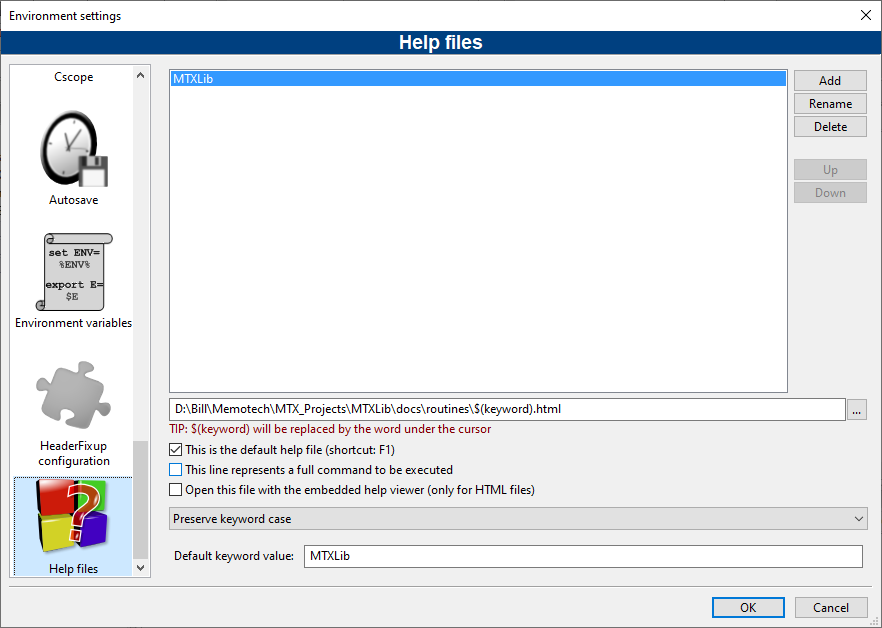
Click "OK" to confirm the configuration and close the dialog.
Having configured this, if you open a C source file in the Code::Blocks editor, position the cursor on the name of an MTXLib subroutine, and type the <F1> key, then help on that routine will be opened.
After first installing MTXLib, and every time the library is updated, it is necessary to build the library. To do this, start Code::Blocks then from the menu select "File / Open...". Open the file "MTX_Projects\MTXLib\MTXLib.cbp". This will load the MTXLib project. To build the library, select "Build / Build" from the menu. The library should build without errors. Please report any errors on MEMORUM.
If MTXLib has been installed using git, then the library source can be updated to the latest version by simply changing directory into the "MTX_Projects\MTXLib" folder and running the command git pull. Otherwise a new zip file has to be downloaded from GitHub, and the existing MTXLib folder replaced by the contents of the zip file. After updating the library source it is necessary to rebuild the library as above.
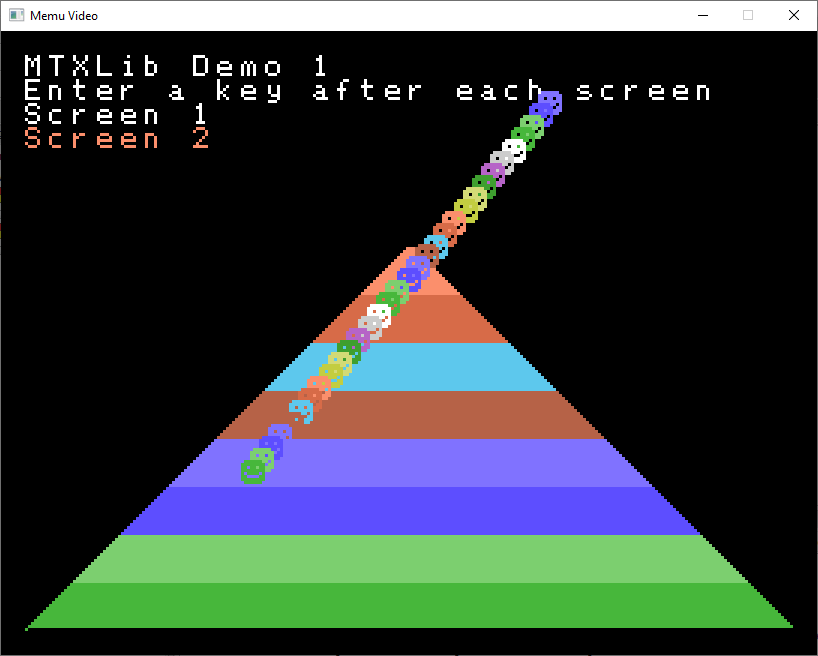
If the demo program has been installed It is now possible to test the configuration by compiling and running this. From the menu select "File / Open..." and open the "MTX_Projects\demo\demo.cbp" file.

Select "Build / Build workspace" from the menu. This should:"
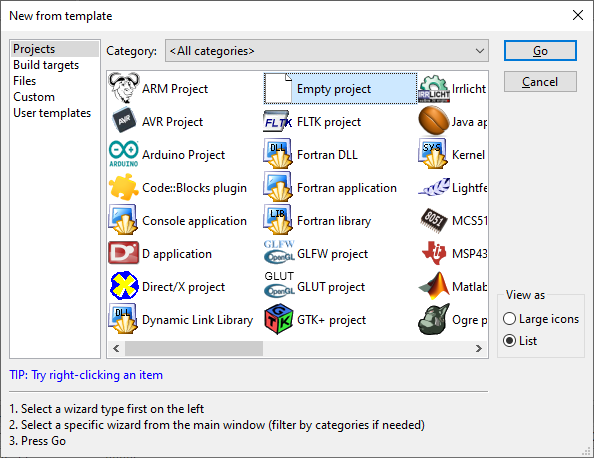
To create a new program, select "File / New / Project..." from the menu. From the resulting dialog select "Empty Project", then click "Go".
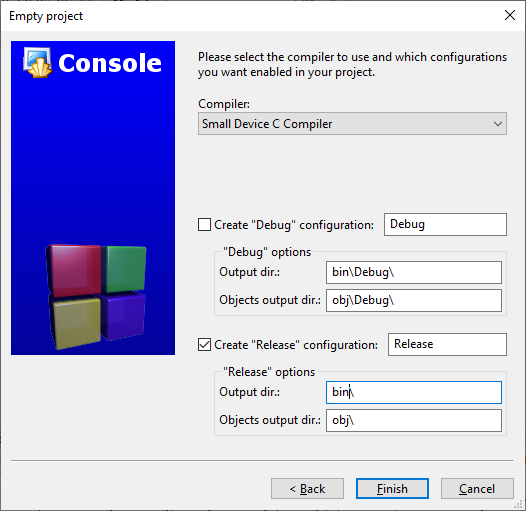
Work through the new project wizard. For the resulting RUN file to be visible to MEMU, the project title should be lower case, have no spaces and be no more than 8 characters. Create a new folder under "MTX_Projects" for the project. The name of the new folder should be the same as the title of the project.
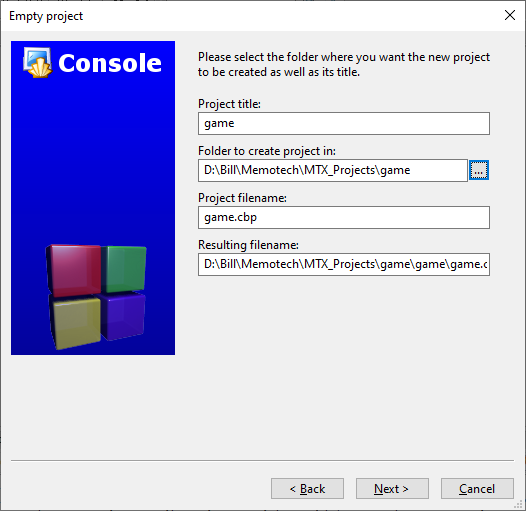
With SDCC there seems to be little point in separate "Release" and "Debug" builds, so just select the "Release" build, and name the output directories "bin\" and "obj\".
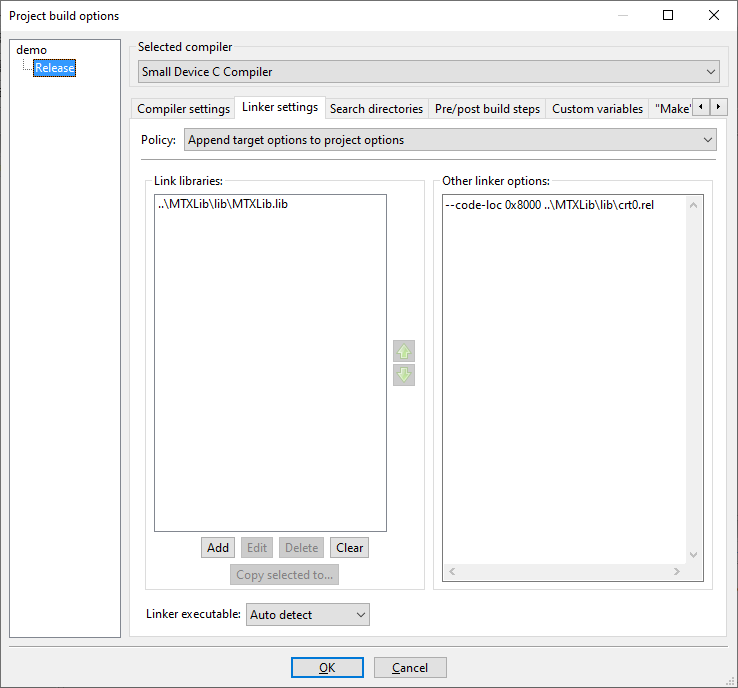
Select your new project, then from the menu select "Project / Build options...". From the resulting dialog, select the "Linker settings" tab. Under the "Link libraries" box, click the "Add" button and browse and select "..\MTXLib\lib\MTXLib.lib". When asked "Keep this as a relative path", answer "Yes". Next, in the "Other linker options" box, paste:
--code-loc 0x8000 --data-loc 0xA000 ..\MTXLib\lib\crt0.rel
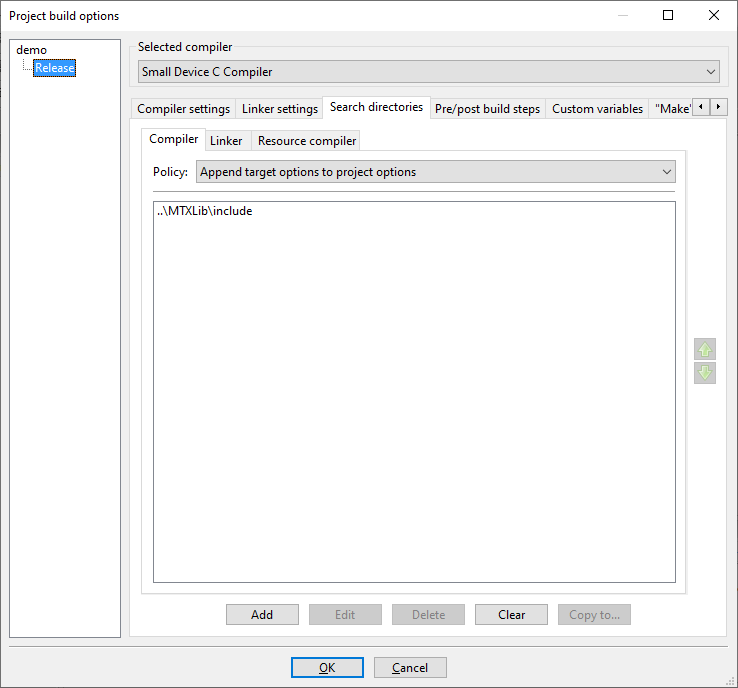
Select the "Search directories" tab. Select the "Compiler sub-tab. Click the "Add" button at the bottom and browse and select "..\MTXLib\include". When asked "Keep this as a relative path", answer "Yes".
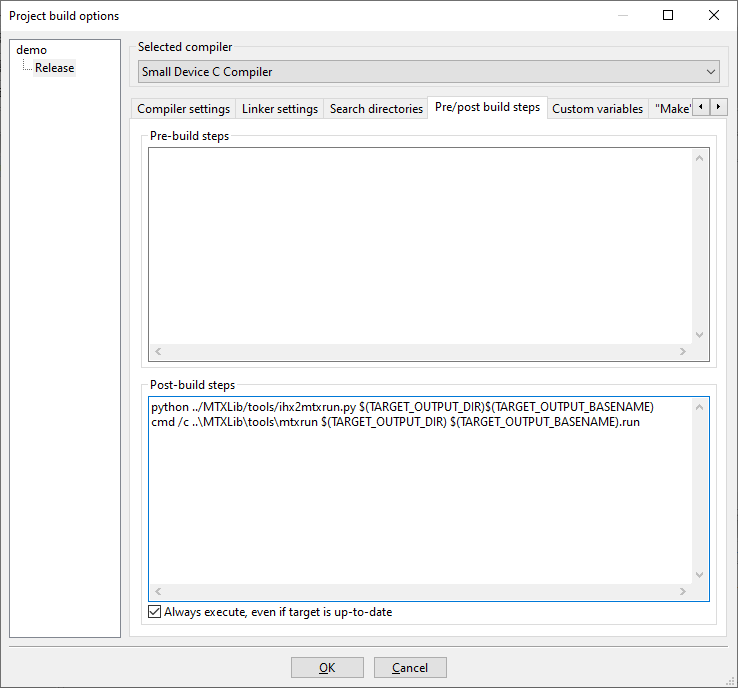
Next, select the "Pre/post build steps" tab. In the "Post build steps" box, paste:
python ../MTXLib/tools/ihx2mtxrun.py $(TARGET_OUTPUT_DIR)$(TARGET_OUTPUT_BASENAME)
cmd /c ..\MTXLib\tools\mtxrun $(TARGET_OUTPUT_DIR) $(TARGET_OUTPUT_BASENAME).run
Finally, check the "Always execute, even if target is up-to-date" option. Click "OK" to close the dialog.
You may now add your C source files, and selecting "Build / Build" from the menu should compile, link and run your program.
During the course of this work, the author has come across a number of issues with both SDCC and Code::Blocks. Some of these are just inconsistencies, in some cases it has been possible to find work-arounds, and some limitations just have to be accepted.